Selecting an Image Suffix
Images for each client can be scanned in or drawn using a specialized graphics program. Several picture formats are supported including:
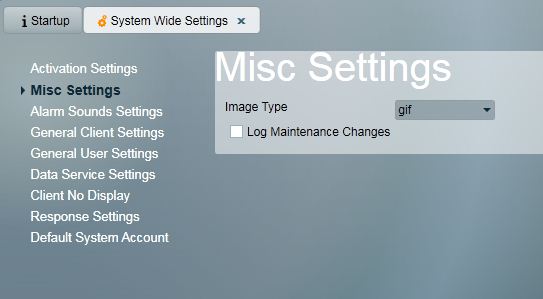
Only one format for both Layouts and user images can be used throughout the entire program. This is determined by the image format chosen in System -> System Wide Settings
To set the format and start using images:
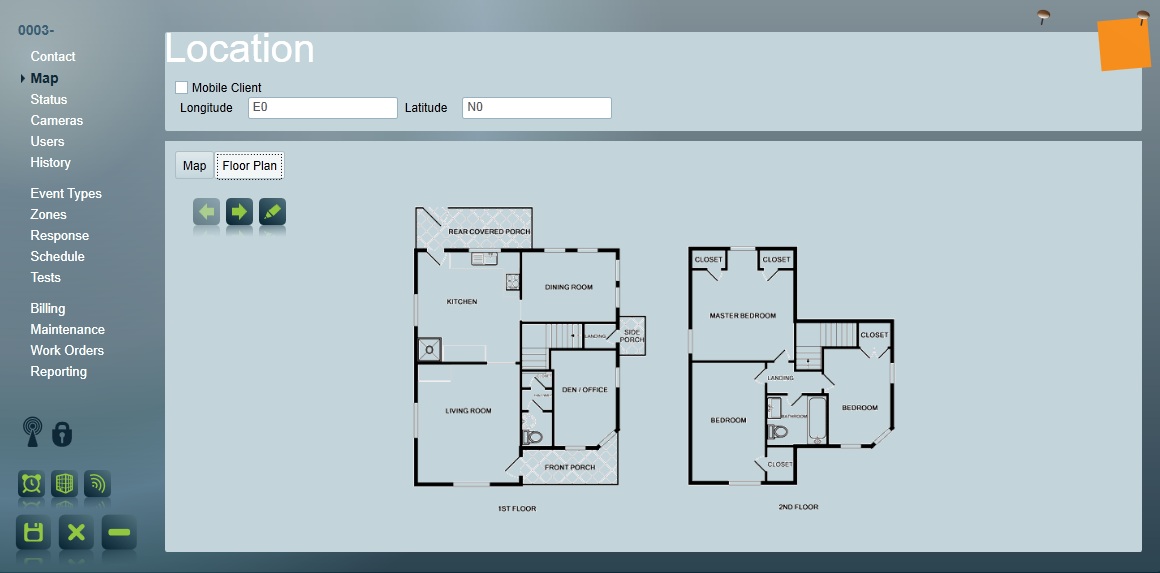
Floor plans are added to the Map Tab of the Client area. Check that your system is set up to use the same type of images as your chosen floor plan (see above). Simply drag and drop the file into the space within the dotted lines in the Map Tab. Your image should appear almost immediately.

Drag image into box
Floor plan added to client
Additional floor plans can be added to a site by simply dragging and dropping additional floor plans onto the floor plans already loaded. Once these additional floor plans are available, the next and previous buttons will be enabled, allowing navigation between the different floor plans. The floor plans can be deleted one by one starting with the last floor plan and optionally exported to a desired location. The delete function will only become available on the last floor plan and if the correct security access is assigned.
You can specify the physical location of selected zones on the site layout. Along with assisting the locating of a zone, recently activated zones are also displayed on the site layout during an activation. Zones with camera coverage show a camera icon, which can be clicked on to jump directly to the live feed from the selected camera.
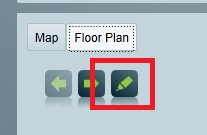
To specify a zones location, click the edit zones position button:
You will now see a list of the sites zones. Any zones that have already had their location specified will be displayed on the layout. Select the desired zone (it will appear in green on the layout if the location is already set). Click and hold the mouse on one corner of the zones location and drag to the far corner. Release the mouse and the zones location will be displayed. The zones new position is automatically saved.
You can overlap the location of different zones but this will probably lead to a confusing layout. Its recommended you leave a gap between different zone locations, as seen this in example:

The selected zone can be moved by clicking and dragging. It can also be resized using the drag-points in the corners. Right-clicking on the selected zone also allows you to remove the zone from the layout. These options are only available in edit mode. All changes are automatically saved.
Select a new zone by clicking on the layout itself, or from the list on the left.
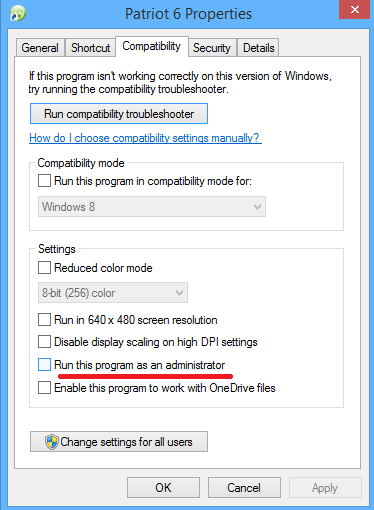
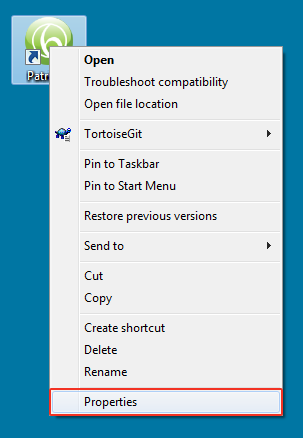
If you are unable to drag and drop image file into the Map tab, one possible reason is that the Patriot Client program is running as an administrator. You can solve this problem with the following steps:
Right click on the Patriot Client shortcut, and click Properties
Switch to the Compatibility tab, and uncheck the Run this program as an administrator option.