
Optional navigation menu for ICA
These instructions apply only to versions of ICA released after September 2015.
The default ICA styling is based on Bootstrap, a free and open source framework for creating websites.
There are many websites which offer free or paid Bootstrap themes which you can use as a base for your own custom styling of ICA.
The simplest method for applying a new style to ICA is to replace or edit the following:
Customisations of the standard bootstrap css classes. You can edit the existing values, or add other css classes to this file.
If you download a custom bootstrap.css file from the web, an easy way to apply the theme is to rename it bootstrap-theme.css and replace the existing file in the ICA folder. Any css classes contained within bootstrap-theme.css will override the standard bootstrap.css classes.
Editing any other CSS files in the Content folder is not recommended. These files are used as a base for the styling, and may be overwritten by future ICA updates.
Due to the nature of ASP.NET and CSS, the logic and the display of ICA are kept quite separate. This allows the look of the website to be changed without altering the functionality.
Note: Some knowledge of HTML and CSS will be required to change to look of your website.
If you are going to make your own changes, please backup all files beforehand.
All the ICA folders should have been installed to the ICA folder on the web server. If a Patriot technician installed ICA for you, this folder is usually called ICA under the IIS root folder. By default this is located in:
Stylesheets are located in the Content subfolder.
Scripts are located in the Scripts subfolder.
ICA uses master pages to apply a general layout to all pages.
There are 2 separate master pages that define a standard template for all pages in the website. ICA.master (in the root folder) and/Views/Shared/_Layout.cshtml. The ICA website is being migrated from an older style to a new style, hence the use of two master pages. Here you can edit page headers, footers, and menus.
You can stop ICA from automatically generating a header on each page by altering the appSettings.config file, and changing the value of the key "xxxxShowHeader" to "NO". This will hide the default station logo, name, and motto displayed at the top of the page.
You can add a menu at the top of the ICA page for navigating to other parts of your website by altering the appSettings.config file, and adding the following key:
This will display a navbar at the top of the page which you can customise with your own links.
You can choose to add a page header to the user login page by opening the appSettings.config file, and adding the following key:
This will display a header when logging in.
The content of the login header is found in the AnonymousTemplate section of the ICA.master page.
It is not recommended to edit any other pages within ICA. All other pages are likely to be updated by future patches. If you do change any other pages, it will be your responsibility to merge your changes in manually after each patch.
ICA can now be branded for each dealer.
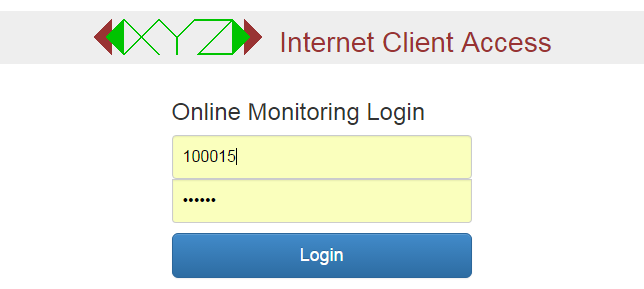
For the dealer logo to be displayed instead of the standard logo, you will need to append the dealer id as a URL Parameter to the login page.
For example you can login by using the link:
Where XX is the dealers ID.
Store dealer logo images in the /images/[Monitoring Station ID]/ folder of ICA, with the dealer ID appended to the image name.
Where XXXX is the monitoring station code, and YY is the Dealer ID.
Images need to be saved in PNG format.
The Dealer ID can be found in Patriot, by locating the dealers Id number under the Users Tab.
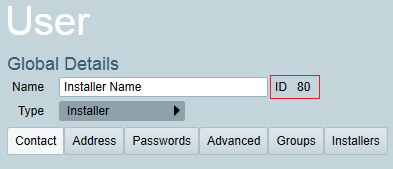
You will need to name the dealer logo image to match. In this example it should be named:
Where the number 1000 is the monitoring station code, and the number 80 is the dealer ID.
For more on dealer branding, see the Dealer Branding page.
You can also override the default logo on the login page, by specifying the monitoring station ID as a URL Parameter. To do this, you would login using the following URL:
Where XX is the monitoring station ID.
Store monitoring station logo images in the /images/ folder of ICA, with the station ID appended to the image name.
Where XXXX is the 4-digit monitoring station ID.
Images need to be saved in PNG format.