Dealer/Installer Setup Guidelines
These guidelines are the recommended approach for configuring a monitoring
site using dealer and installer companies. The guidelines cover setting up each
dealer to have access to their own sites as well as storing relevant company
details. The recommended setup includes two categories. First, the installer
must be assigned to each site as a user. This allows reports by-user to be run.
In addition, client groupings should be set up to allow operator filtering to
be used and standard reports to be filtered by-dealer as well.
Setting up Site Groupings
Each site should be assigned a site grouping that corresponds to the dealer
name. It is recommended to set aside an entire Site Groupings category for
Dealer names.
To enter and update these groupings, open the Maintenance Menu ->
Clients -> Site Groupings
Insert a new site grouping type, and enter an appropriate name, e.g.
"Dealer". Add a site grouping to the grouping type for each dealer in the
system. New dealer items can be added easily by returning to this screen.
Clients can be added to the appropriate dealer group by using the Default
Client Grouping option on the installer details (below), or manually set for
each client using the Reporting Tab.
Setting up the Installer user.
The installer is set up as a standard user, and assigned to each individual
site that they are responsible for. See the Users
Tab documentation for information on creating the installer user and
assigning them to each site.
The user type should be changed to Installer. The following fields are
available only to Installer users:
Account Number: If an existing account number exists
for this installation company, it can be entered here. This number will be
available in reports generated for the installer.
Reporting Email Task: If set, this email task will be
used when sending by-user reports for this installers clients. This can be
used to send reports from the dealers email address by going through the
dealers email server, and thus bypassing relaying restrictions. Leave this
blank to use the default system email task. If a report for a single user
includes clients from multiple dealers, the settings of the first dealer
found will apply, so ensure that each reporting user is only assigned to
clients from a single dealer.
Default Client Grouping: If a site grouping value is
entered here, clients will automatically be placed into this group when the
installer is assigned. (Requires Internet Dealer Access Module)
Default Instructions: These are dispatch instructions
that will be shown in the installer user's contact card on the activation
screen. Changes to these instructions will apply to all sites with the
installer user assigned. In addition to these default instructions, the
standard per-site user instructions are also included in the installers
contact card.
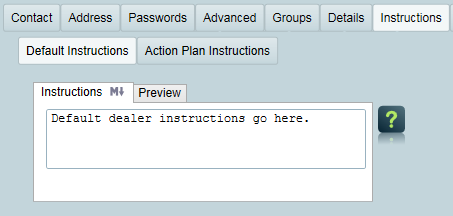
Default Instructions for Dealer
If you have an Enterprise license, you can also use Markdown tags to
format the text of the instructions. For more details, see Formatting Response
Instructions.
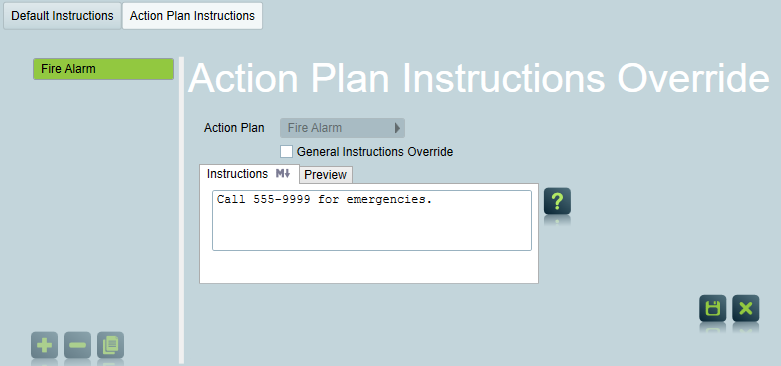
Action Plan Instructions: You can set dispatch
instructions for a dealer which will be shown on the site dispatch
instructions for all clients belonging to the dealer (provided that Event
is selected as an instruction source in the response plan) when an alarm of a matching
action plan is triggered. Optionally, you can choose to override the action
plan's global instructions - in which case the dealer's action plan
instructions will replace the global action plan instructions instead of
adding them on to the normal instructions.
Custom action plan site event instructions can be set for a dealer's
clients.
ON: Only the text in the Alternate
Instructions box will be used as instructions for this type of
alarm.
OFF: The Alternate Instructions will be shown in
addition to the normal dispatch instructions.
Charges Overrides: This allows charges to be replaced
or modified for the clients belonging to the installer.
Response Plans (requires IDA
module): Override an action plan's global response at the
dealer level. Refer to the Action Plan & Response Overrides section of
Action Plans for more information.
Action Plans (requires IDA
module): Override the action plan selected at the dealer
level. Refer to the Action Plan & Response Overrides section of Action Plans for more information.
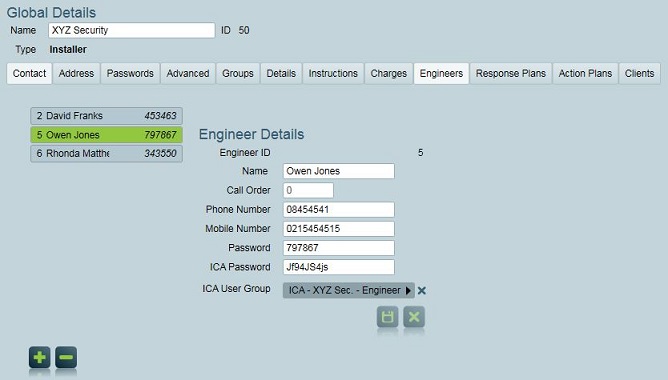
Engineers: Specific technicians and engineers working
for the installer can be entered here, along with their passwords and
contact information. These details can be used on the Test Mode screens
when maintenance is being done on-site. Engineers can also be placed into
an ICA User group (requires IDA module) and
given an ICA Password which allows engineers ICA access to all of a dealer's clients.
Note that an engineer's ICA access rights are configurable via the ICA User
group settings as per regular ICA users.
Dealers may be assigned "Engineers" for use as response plan contacts and
to give ICA access to employees.
Showing Dealers on Response Plans
Dealers can be added to their clients' response
plans by inserting the Installer user type into any
standard typed response plan. This works the same way as assigning any other
user type type to a response plan, so make sure that you check
Respond when assigning a client's dealer if you wish the
dealer to appear on the generated response plan. A response plan including the
installer user type can then be assigned at the global, dealer or client level.
Refer to the Action Plan & Response Overrides section of Action Plans for more information).
Warning: the following feature is only available when the
Legacy Site/Dealer Call Order setting is enabled in the system wide response settings. This legacy
feature will be dropped by Patriot in the near future.
The dealer can be automatically added to all response plans for their
clients from the System Wide Settings
screen, by setting the Installer Call Order field on the Response Settings tab.
If this is set to a value greater than 0, any Engineers assigned to the Dealer,
who have a call order greater than 0, are also added to the response plans.
Useful features and options
The following features are often used by dealers once the system is
configured suitably. Follow each link for more information about each
feature.
Automated Reports - these can be sent to
each installer automatically, covering only their own sites. For example, each
installer might want a weekly activity report
Work Orders - required maintenance work can be
recorded along with any charges and deadlines. Combined with automated reports,
the required work can be automatically emailed to the installer.
With the Internet Dealer Access Module, the following additional features
are available:
Internet Dealer Access - allow the installer to
log in directly and securely view their own sites only using the standard
Patriot client software.
Dealer Branding - adding a logo to the top
of each client screen allows the operator to easily see which installer is
responsible for any open client. Branding can also be used in reports.
Related Pages