Merge Data can be used to import new Templates, and also import regular client which have been exported out of another Patriot system.
To import template, go to the Patriot Templates page, find the template you wish to import and select it from the For Import column. You should be given the option to Save the file on you PC. Find the file you just downloaded. It will be an xml file.
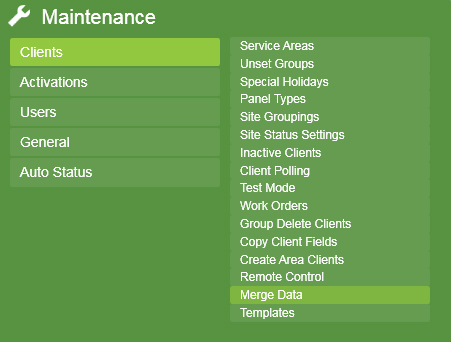
To merge go to Maintenance Menu Item -> Clients -> Merge Data.
Merge Data
The Merge Data window will appear.
The options displays will depend on the format of the file to import. Older templates files may display different options to what is covered here.
On this screen, you can select the input file. Browse to the .xml file created earlier. Patriot will now parse the input file and load up a list of all Action Plans that are referenced by the input clients.
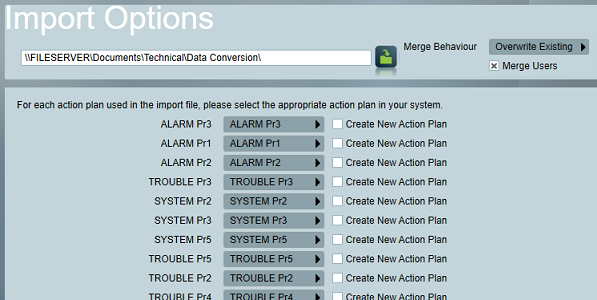
Each action plan from the import file is shown in a list, with a selector next to it. Pick action plans to use on your system by clicking on each selector. Do this for each action plan in the list.
You must also decide which Merge Behaviour Patriot should use when imported client and related data conflicts with existing data:
When using the Merge Existing option with the data conversion spreadsheet, only the bare minimum of data needs to be entered into the spreadsheet. For example, if you only want to update the zone listing for one or more clients, you only need to enter the client number once on the "Clients" worksheet, and then the client, zone, and module numbers on the "Zones" worksheet, along with the zone fields that you wish to update.
Note: although the Merge Existing import option supports the data merge of all client and related data from the data conversion spreadsheet, it does not support the merge of all the client related data supported by Patriot XML import facility. The data types currently unsupported are: Verified Address, Add-On Device, Action Plan Overrides, and Engineers.
Click save when you are ready to import. A log is generated showing the progress. Once the data conversion is complete, this log will also be saved into the same directory as the input .xml file.
Maintenance -> Clients -> Export Data, can be used to export a selection of clients out of Patriot and into a xml export file. This file can then be used to import this data into another Patriot system using the Merge Data feature above.
With Export Data open, search for and select the first client you wish to export and click the insert button to add it to the Included Clients list. Repeat this process until all clients you wish to export are showing in the included clients list and then click the save button to choose a destination to save the .xml file to which the clients will be exported.
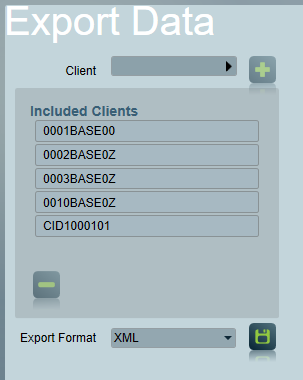
Bulk clients can also be exported from the results of an Advanced Search.
Scheduled jobs can be setup to automatically perform either data import or exports. These scheduled jobs can be setup from System -> Database -> Automated Import/Export. Only one of these jobs can be configured per system, so either import or export.
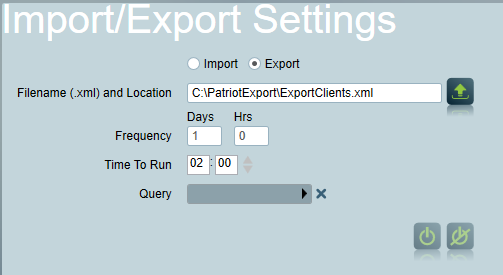
Automated Import/Export
The basic settings for Import and Export are the same. Select the file to either Import or Export respectively. Set the frequency of the job, and time of day to start the first job.
The Export also has a query setting. Here you must select a pre-configured query which defines what clients will be exported. The easiest way to create this query is to use the Advanced Search. Create the Search that defines the clients you wish to export, then save the Advanced Search, and ensure you check Save As Query. This will make the query available in Reports -> Queries -> Stored Queries.
You must also set the order of the query correctly, otherwise any sub areas of clients imported will not import correctly. If you have created your query using Advanced Search you can't edit it directly, so you must copy the text from the Query entry box, and then insert a new query, and paste in the query text. Then change the Order By from
...ORDER BY mem.Client_No
to
...ORDER BY mem.Client_No desc
Then Save the query.
Alternatively, you can define a query by hand directly from Stored Queries. The query must have at least two fields returned, and the second field must be the client_no of the client to export (the Advanced Search built query does this automatically). It must also order the clients by Client_No desc.
You can now select this query from the Query Selector when setting up Automated Export.
A signal will be logged to record the result of an automated Import and Export job. The following system events are used